
This post will go over how to write out a bog-standard CSV file from power automate.
So a work colleague had a situation where they were very happy with a summary excel workbook (containing many sheets) that I was generating from Power Automate, but then they mentioned that in order to load the information into SAS they still needed to save each excel sheet as a standalone CSV file. This highlighted an extra manual process that could be automated out.
Solution Outline
Based on the previous posts about Power Automate and Excel, we’re dealing with a situation where we consume a collection of source Excel files and output collated collections of data.
It’s relatively straight forward (as you’ll see) to create a csv file for a dataset, the problem occurs during the looping process as appending to an existing csv file has a few behavioral issues.
NOTE: There are a huge variety of connectors being published for the Power Automate environment all the time so there may be a connector out there that renders most of the advice in this article moot.
Basically we're going to take a variety of different data tables from an excel workbook and save them out to individual summary csv files. To do this we are going to read in each data table and store the contents as a CSV formatted string - which will then be written out to a flat file.
Reading in Data
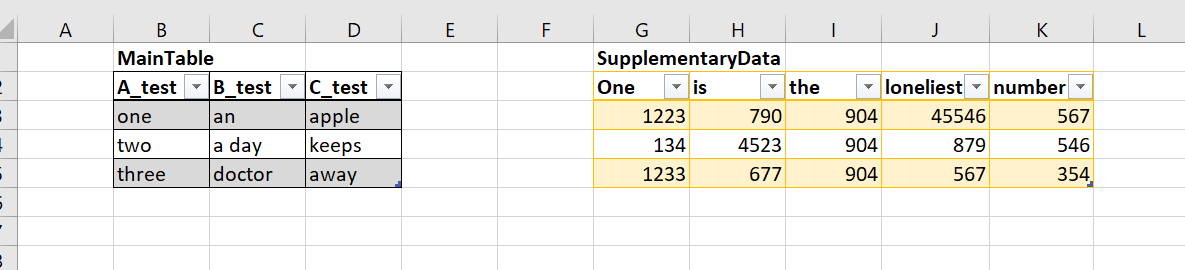
First things first - you're not going to get any data from excel unless it's stored in a data table. You can manually create this, or do it dynamically (as I've done in another post https://www.optimalbi.com/post/power-automate-and-excel-data-tables). Our example file has two sample data tables that we want to write out to individual csv files.
Setting up the Cloud Flow
First things first, lets create a simple Cloud flow with a manual trigger. Once that's done we need to initialize our two string variables that will be holding all of our CSV data.
Because each string variable is representing the content of each csv file that will be generated we first need to supply the names of each output column that we want to put in a header row (if you don't want a header row in your output file then you can leave this blank).
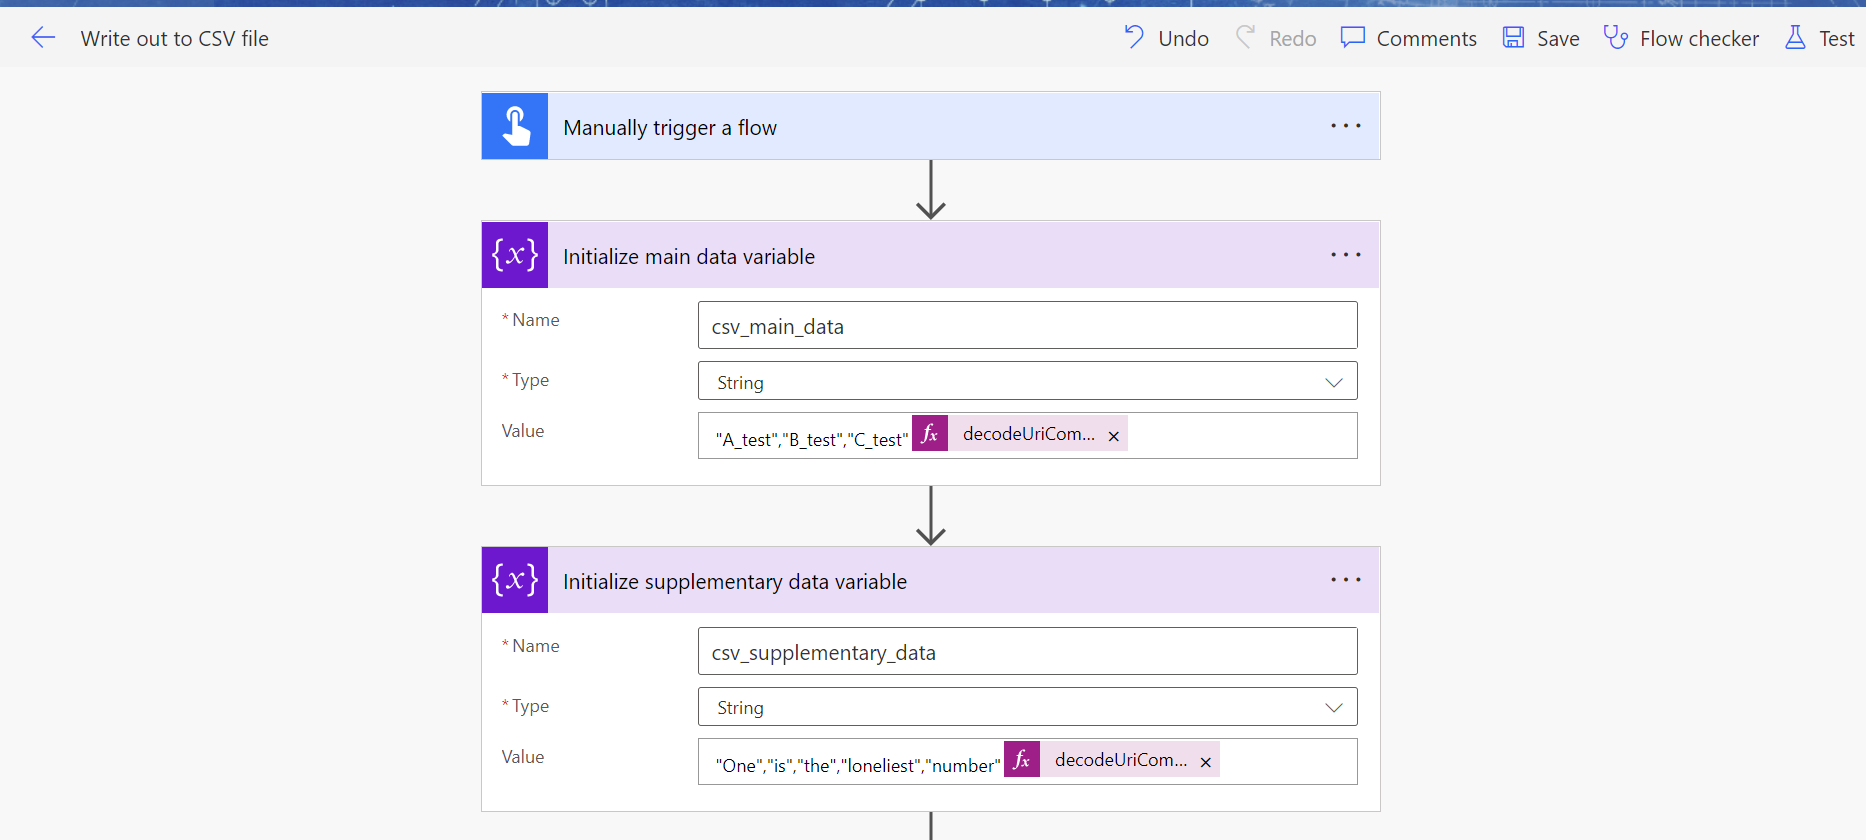
Note that there is an expression decodeUriComponent('%0A') present at the end of the row - this is what creates a new line character at the end of the row. If we didn't have it, the header row would run straight into the first row of data. We don't need to do this later on as we are using explicit CSV actions which will add a new line character automatically after each row of data.
Reading in the Data
To get the data into the cloud flow we use the straight forward Excel Action of List Rows present in a Table. In the example shown below I'm using OneDrive to source my files, but you could also use SharePoint as well.

Rack it, pack it, stack it
Now that we've got the data read in, its time to create our output CSV rows. To do this we use the Data action Create CSV Table, and because we're dealing with an Excel dataset source we need an Apply to each loop to go over each data row. At then end of the loop we simply append the output to our desired string variable. See the following screen shot for the details - which I'll expand on below:
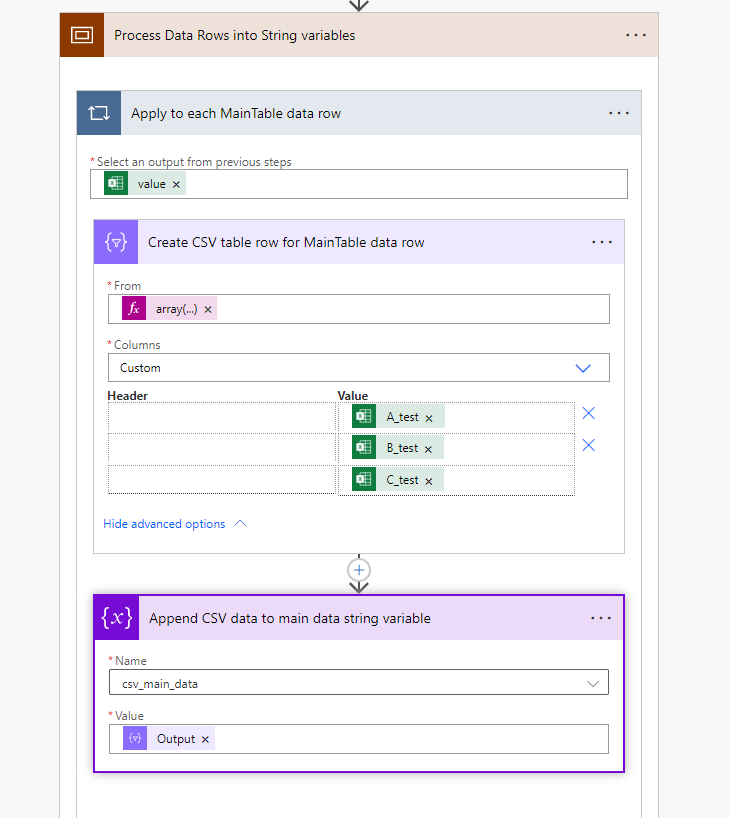
Lets break down what's happening here:
- The Apply To Each loop iterates over each row of data from the MainTable data table in the Excel file.
- For the current row being processed we feed it into the Create CSV table action. Because the action expects an array of data to be provided I've had to explicitly cast the collection of items to an array using the following expression array(items('Apply_to_each_MainTable_data_row')).
- In the Create CSV table action I've chosen to use custom columns for two very good reasons:
1) I can have complete control over what fields (and their order) are in the output. This way I can align them to the initial header row we created when initializing the variable.
2) It allows me to leave the header rows blank which prevents the action from duplicating the header row each time the loop runs - which we definitely don't want in the output. - Finally we append the current row of CSV data to the desired string variable.
For the supplementary data we simply repeat the entire Apply to Each loop and it's contained actions.
Write it out to file
Now for the simplest part of the process, the actual write out to flat file. For this example I'm again using One Drive - feel free to use your desired destination (although it may require a bit more configuration than what's shown below).
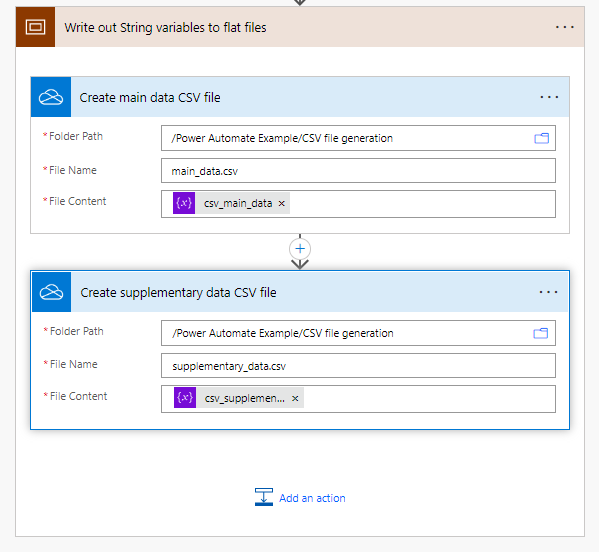
All that we have to do is supply the contents of the variable to the Create file task and that's it. The generated output files are as expected (I've opened them in a text editor - but you can use excel as a default as well).

Unicode File Output
When you write out the data as shown in this example its in the standard ANSI file format - but what if you want to use UNICODE? Well it turns out that this is very easy to do.
When you initialize the string variable(s) at the start simply make sure that the expression uriComponentToString('%EF%BB%BF') is at the start of the string - this inserts the required byte sequence at the start of the csv file and formats it as Unicode.
That's about it - I may revisit this post later on with an alternative approach to processing input data as JSON data set which allows everything to be done in one pass without any loops, so stay tuned.
