So in a previous post I outlined a large collection of the free stuff that Microsoft gives you when you sign up to Azure. So enough talking lets get our feet wet..
The pull tab to get us started is located at https://azure.microsoft.com/en-us/free/ where there’s a nice green button called [Start Free >] that’s just crying out “click me, click me!”.
Bowing to the inevitable we end up at (https://signup.azure.com/signup). There are four steps to the sign-up process:
- All about You – fill in the stuff that identifies your account (personal or business). Interestingly because we’re located in New Zealand we get a box for us to put in a GST number (if applicable). A little bit of testing finds out that your relevant countries taxation brand gets supplied.
- Phone verification – Simply provide your phone number and you get a verification code.
- Card verification – Enter your details blah blah, and you may get a temporary authorization hold of a couple of dollars applied.
- Agreement – Four lovely novels of wording – basic summary is – all care no responsibility, you don’t pay now but you will, what happens with your personal details (lots of stuff), and how we can spam you into submission. Got to agree to all of this to proceed – but you can choose whether or not to be inundated with “special offers and one-time deals”.
And that is that, we now land on our portal page.
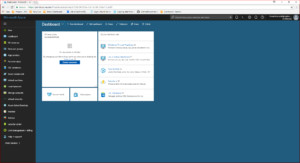
So many things to do – if you want to peruse the documentation for everything it’s here https://azure.microsoft.com/en-us/get-started/.
So where to first? Well since we provided a credit card and we will have to switch over to a pay-as-you-go subscription at the end of 30 days (see previous post for explanation) – lets see how we monitor our billing. From the options on the left choose Cost Management + Billing. This gives us a nice dashboard summarizing the financial situation.

The left pane has the following sections available:
Overview – Does what it says on the label.
Cost Management – This is a link to subscribe to a separate service provided by Cloudyn which is supposed to help you manage things better. Apparently it is free (we all like that) but as with the Azure “Free” there are premium features bundled which will disappear after 30 days. I’m not planning on exploring this here in this post, but if you want to find out more you can have a look at https://docs.microsoft.com/en-us/azure/cost-management/overview.
Diagnose and solve problems – This contains a shortlist of common problems and solutions, plus the ubiquitous support link.
Subscriptions – This is a simply summary of the subscription and it’s status. Since we’ve just signed up it should just have the Free Trial one. Obviously this will change at the end of the 30 days.
Invoices – Obviously this will be empty at the moment, but once the subscription flicks over to pay-as-you-go expect this to start filling up.
Contact info, Billing Address, Payment methods – This should contain the information provided during the sign-up process.
New Support request – This spawns a support request dialog, but since you’re on a Free subscription with free services I wouldn’t expect a high priority to be assigned.
The rest of the main menu options present nice summaries of the different service groups that we have – which are none. But once we start partaking of the smorgasbord of goodies we can easily manipulate the groups displayed to show our favorites.
“Ok” you say, “very nice but what about actually doing something?”
Righto – since I’m a data geek, lets start with a 12 month free SQL Database. There’s a nice handy quick start tutorial right on our starting dashboard. The tutorial mentions that we can create a database through different ways: Azure Portal, Azure CLI, and Azure PowerShell. Lets start as we mean to continue and stay with the Azure portal.
From our main dashboard choose SQL databases, and click on the Create SQL databases button.
Now we get to fill in a nice list of fields/options:
Database name – up to you
Subscription – Free Trial – you don’t get to change this.
Resource Group – A resource group is a container that holds related resources for an Azure solution. Since this is the first thing we’re ever creating then we choose Create New and supply a name (in this example FreeStuff).
Select source – This can be a Blank database, the AdventureWorksLT sample, or Backup to create a new database from an existing backup. I’m going with AdventureWorksLT so that there’s something to work with straight away.
Server (Configure required settings) – This expands out into a dialog requiring the following database server details: Server name, Server admin login, Password, and Location. Most of this is straight forward – make sure you store the login details somewhere safe, and when you pick a location you want to choose one that hopefully will be the same as your other services. If you have different locations for different services and they pass data around between themselves you’re going to end up paying for it.
Want to use SQL elastic pool? – Lets stick with the default of Not now.
Pricing tier – This is where things can get tricky – According to the documentation for what you can have for 12 months free, we can have 250 GB of SQL Database standard S0 instance with 10 database transaction units (DTUs). But when you are configuring the performance you can select the next level up (S1) instead (you can’t go higher than this). So what? you may ask – well I’m betting that if you configure it at S1 you’ll start burning the candy credits you get in the first month, and then when you have to switch to the Pay-as-go subscription you’ll get a rude shock before you re-configure to go under the payment threshold. For this example I picked S0 with 5GB as I’m guessing it’s pretty simple to reconfigure as necessary.
Collation – We can’t change the default setting.
We have an option to Pin the database server to the dashboard, and why not since we’ve like to see it every time we login.
Click on Create, and things get validated, and then you get a nice progress square stating Deploying SQL Database. This also turns up under Notifications. Deployment time took about 5 minutes for the above configuration and we end up with the following screen at the end of it.
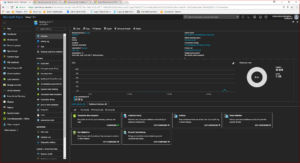
Lots of wondrous options and settings here which can be explored here https://docs.microsoft.com/en-us/azure/sql-database/. There are a few things to be aware of – unlike a standalone SQL Server database server instance (On-premise or VM) – each instance of an Azure SQL Database is a single database – every time you want to add another one it becomes it’s own living breathing entity – unlike a database server which can house many related databases together. Also there will be some SQL Server features that are simply not available to Azure SQL Database. Please refer to https://docs.microsoft.com/en-us/azure/sql-database/sql-database-paas-vs-sql-server-iaas for full details.
Now one final test before I go, can we connect and query the data? – which is sort of the acid test for a database server. Go to the Overview option for the SQL database and click on the Tools toolbar and choose Query editor (preview). There are some more terms to accept and then you’re into the data explorer.
Click on Login and provide the Server Login details we originally supplied to get the Query tool displayed.
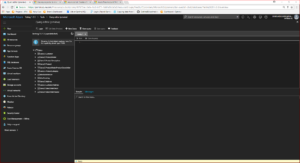
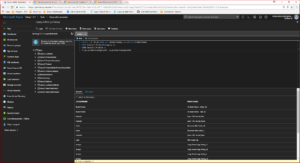
Lets run the following query and we should get results.
SELECT TOP 20 pc.Name as CategoryName, p.name as ProductName
FROM SalesLT.ProductCategory pc
JOIN SalesLT.Product p ON pc.productcategoryid = p.productcategoryid;
Now there’s always more than one way to skin a cat, so lets attempt connecting to the database from SQL Management Studio on a local machine and that should suffice to close things out.
So how do we do this – navigate through the Azure dashboard to your SQL database overview page (SQL databases > [your recently created database]) and look for the Servername field in the top right. Mouse over it and choose “Click to Copy”.
Now switch over to SQL Server Management Studio (what do you mean it’s not open on your desktop already? – tsk, tsk). Choose to connect to a Database Engine and enter the following properties:
Server Name – the value we just copied from the Azure dashboard.
Authentication – SQL Server Authentication
Login/Password – the credentials we used before in the online query tool.
Don’t click on Connect yet – Choose the Options button and enter the name of your database in the Connect to database field. At this point you’ll get an error about client IP access:
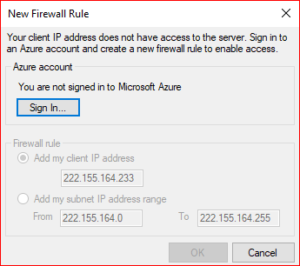
At this point you’re probably thinking of a whole bunch of rude adjectives and that’s fair enough. We didn’t set up a server-level firewall rule that allows us to access the Azure database server. We could do it from the handy short-cut dialog presented, but instead lets go back to our Azure dashboard and navigate to the Overview page for our database (if you can’t remember the instructions are above). Once there click on [Set server firewall], and then [+Add client IP] to add in the IP address of the local machine where you’re currently accessing from. Click on Save and then Ok.
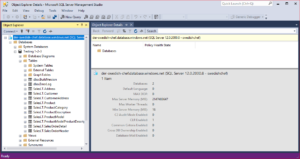
Now when we go back to Management Studio and click on Connect (you’ll need to cancel the New Firewall rule dialog box) and we should have our sample database displayed.
If you’re still getting an error about connecting to the database and it regards port 1433 then the following notice from the online documentation may help.
SQL Database communicates over port 1433. If you are trying to connect from within a corporate network, outbound traffic over port 1433 may not be allowed by your network’s firewall. If so, you cannot connect to your Azure SQL Database server unless your IT department opens port 1433.
Final thoughts for today – Azure SQL Database databases are hosted independently of other Azure resources such as Virtual Machines, so this won’t chew into the disk allowance that you have for VMs as part of the 12 month free promotion.
Until de next de time – bork, bork, bork.
